New Stuff

I turned my tragic frosted mirror project into a chalkboard. I like it lots better.

IMG_4362

IMG_4365
The nice guys at Lowes cut a piece of wood for me the same size as the old mirror, and then I painted it with chalkboard paint. And I really did make cheeseburgers in a pan, but usually that menu will say, "You're on your own, I'm having microwave popcorn."

And here is a new rug I got at Target.
Living Room4
Zach dripped pizza sauce on it approximately 26 minutes after I got it home. Which is REALLY awesome.

Aluminum Chair

If you are like me you have been wanting chairs like these for your kitchen:

alum dwr

But have not bought them because they are $450 each at Design Within Reach.

And even the knock-offs are over $130 each at both Target and Walmart.

Well I am about to make all your dreams come true, because I just found these babies for...are you sitting down? $52 bucks.

alum
(I know it says "door" instead of "chair" but I called them, they said they're just mis-labeled, but the price is correct.)

I spent half my day patting myself on the back for finding these and the other half playing Restaurant City on Facebook. So PRODUCTIVE day I'd say.

DIY : Frosted Mirror

I took this old mirror off my dad's hands awhile ago, and I finally decided to do something with it.

IMG_4332

I was inspired by this project, so I bought some of this:


I used stick-on letters and drew out a floral design on contact paper. It looked like this, then I applied the frost spray.
IMG_4337

Now it looks like this.
IMG_4345
Meh. I'm not in love with it. It's one of those projects that I get really excited about and run around like I'm on meth while I'm getting it done. And then when it's finished, I wish I would have spent my evening on the couch with a Sookie Stackhouse book and some popcorn instead.

Room Board : Erin and Donny's Office

My friend Erin, left the following comment on a previous post:

"i would love your help to finish my office. it's technically donny's :( and it's the one room he has design control over in the house-but it's hard because he wants it to be an outdoors theme. any suggestions w/o becoming too tacky?"

I definitely know the pain of a husband having design opinions. Zach has made many suggestions for our house including a red and silver color combo, hanging beads in lieu of doors, and using posters from Spencers. So an outdoors themed office is pretty mild in comparison.

I think the best way to approach Erin's dilemma is to use elements from nature as well as a few clean modern pieces so as to avoid the Bass Pro Shop look.

Like this!
masculine2
Via Canadian House and Home

and this!
masculine
Via Canadian House and Home

and this!
brown antlers[1]
Via Elements of Style

And here is a quick room board I put together:
Erin's Office

Sources:
Vintage Print - $20
Antlers - $99 for set of three
Desk Lamp - $69.95
Woven Desk Accessories - $15 and $25
Metal Accordian Side Table - $60
Cowhide Rug - $250
Desk - $119
Chair - $129.99

Good Luck Erin!

DIY : Door Desk

So what do you do when you want an "L" shaped desk but you are cheap? You make one out of two doors. Here is how I made mine.

Here are the supplies I used and about how much I spent.
DIY Table

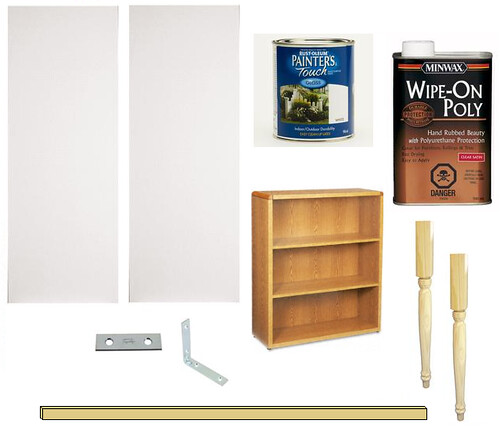
(2) 24"x80" interior doors - $20/each = $40

(2) 29" table legs - $12/each = $24

White interior latex paint = $10

Wipe-on polyurethane (clear gloss) = $10

29" high bookshelf = free
(Make sure the bookshelf is the same height as your table legs.)

(4) "L" brackets and (1) flat bracket = about $4

Piece of lumber sized 1"x2"x96" = $8
(The wood board needs to be about the same length as long side of a door + short side of door, which for me was 80" + 24" = 104", but 96" was plenty long enough to support it.)

TOTAL for entire desk = about $96


The first step is mounting the wood board to the wall. This is going to support one side of the desk, like this:
IMG_4325
My bookshelf and table legs were all 29" tall, so we obviously mounted the board so that the top of it was at a height of 29".

Before you start to put together the rest of the components, paint everything white.

Next attach the two table legs to one side of a door. I didn't take a picture but it looked like this, thanks Google.


Then it's simply a matter of setting the doors onto their various supporting elements. One door is supported by the bookshelf on one end, and the wood board on the other.
IMG_4329

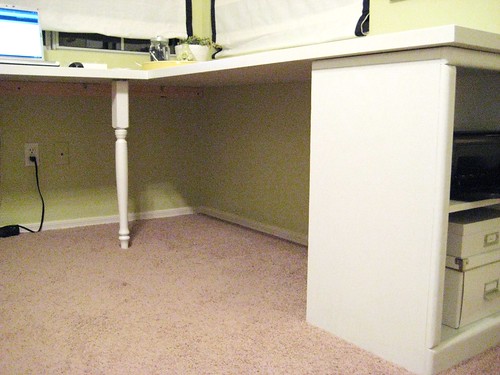
The other door is supported by the two legs on one side, and the board on the other.
IMG_4328

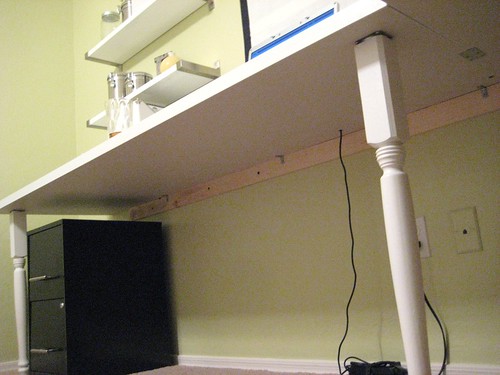
We used a little wood glue on top of the wall board and on top of the bookshelf to keep the doors from sliding. Then connect everything together with the brackets and drill a hole where you want your computer cord. Finally I wiped on two coats of clear polyurethane after it was all put together.

Done and done my friends.
IMG_4314
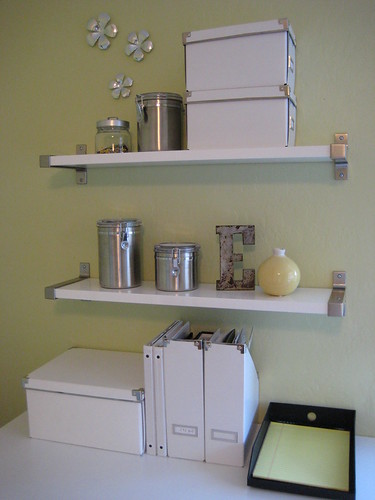
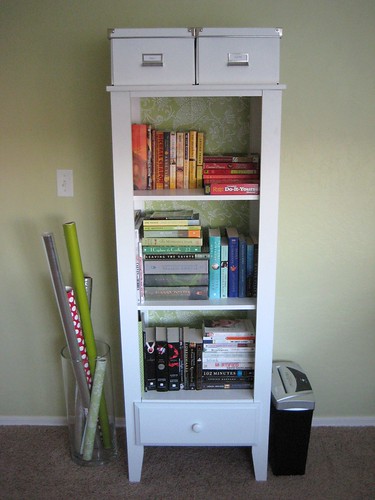
Now you're all very sick of my office. I'll talk about something else tomorrow I prom prom promise.
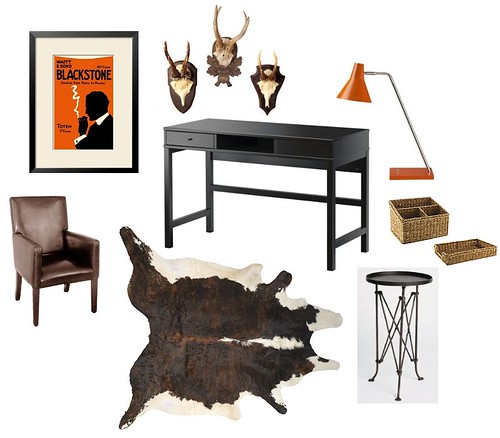
Before and After : The Office

For the last couple of weeks I've been obsessed with getting the office together. The goal was to make it pretty and functional, instead of beige and gross; while spending as little cash money as possible.

Before:
$MG_4219

After:
IMG_4314

I made the desk, with help from Zach, using two doors, a small bookshelf that I already had, and two table legs. I'll expound on this project in another post.

Before:
$MG_4220

After:
IMG_4292
The wicker chair is from a thrift store, it was twelve buckaroos. I threw a couple of pillows that I already had on it. The yellow stool is from HomeGoods.

I didn't spend any money on the artwork. I already owned all the frames. All of the art consists of things I already had (fabric and giftwrap) or things I printed on my home printer. I used three sources for printing artwork: Vintage Printable, a disk of clipart images I had, and Dafont.com. The pear, bicycle and tree sihouettes are all Dingbat fonts I downloaded from Dafont.
IMG_4292

The paint color is from Valspar, called Plum Passion (which is weird because it's not purple). The roman shades I made from the existing faux wood blinds that we had using Jenny's tutorial from Little Green Notebook. I was a little nervous, but they turned out okay. I think I will go back and add a liner to each of them. I used an old Ikea curtain for the fabric, and glued on black grosgain ribbon.
IMG_4285

I replaced the black plastic pulls on the file cabinet with new brushed nickel hardware. The shelves and the containers I already had, and most of them are from Ikea. The silver wall flowers are from Target and were on clearance for about a dollar. Target and Ikea hold the answers to all of life's problems.
IMG_4282

IMG_4295

I eventually want to get a bigger bookshelf, but for now this one will work. I put my gift wrap in a big vase that I got forever ago, I think at Ross.
IMG_4280

The desk chair I also got at a thrift store for $15. It was in pretty good shape so I just recovered the upholstery with some fabric from Joann's.
IMG_4288

IMG_4289
And there you have it, my new office! When all was said and done I spent about $200 benjamins.

Hello!

Welcome to my home design blog! Swallowing cheeseburgers whole and decorating my house are probably my two favorite things. Not at the same time though.